
Import data from Optimizely Customized Commerce 13 or 14
Import your customer list, product catalog, and order data from Optimizely Customized Commerce 13 into Optimizely Data Platform (ODP).
Note
This integration imports data from Customized Commerce 13 or 14 into Optimizely Data Platform (ODP).
This app is in the ODP App Directory and is an older approach. For a more stable integration depending on your version of Customized Commerce, use one of the following:
With this integration, import your existing customer list, product catalog, and order data from your Optimizely Customized Commerce account into ODP continuously.
Integrating Optimizely Customized Commerce has the following values and benefits:
- Unify your data across multiple sources and gain access to comprehensive, persistent customer profiles. ODP combines online and offline, historical and real-time customer data to get a complete view of your customers.
- Leverage important analytics, enhanced by AI-driven segmentation, to understand how your organization performs against its goals, including customer behavior and engagement.
- See the complete customer journey and understand how your various channels are performing.
- Enrich your customer understanding and segmentation with predictive insights, including Time to Next Order, Likelihood to Purchase, and Winback Zone.
- Refine your segmentation strategy based on your customers’ on-site and buying behaviors through ODP’s data science-driven insights.
- Use customer data to personalize messages, content and recommendations, and create relevance at every customer interaction.
- If you have multiple Optimizely Customized Commerce markets, you can select specific markets to import to ODP. This way, you can split your market data between various ODP accounts.
Note
For markets support, you must have version 6.3.0 or later of the Customized Commerce Service API.
Requirements
- You must have an existing Optimizely Customized Commerce storefront with the Service API installed.
- If you have multiple sites to integrate into ODP, you must request an ODP account for each site.
- Before installing the Optimizely Customized Commerce app in ODP, you must get the Optimizely Service API NuGet package. If you are using .NET 5.0 or .NET 6.0, use this NuGet package. For information on installing and configuring the Service API, see the Optimizely Customized Commerce developer documentation.
- You must have Customized Commerce 13 or 14.
Configure the integration
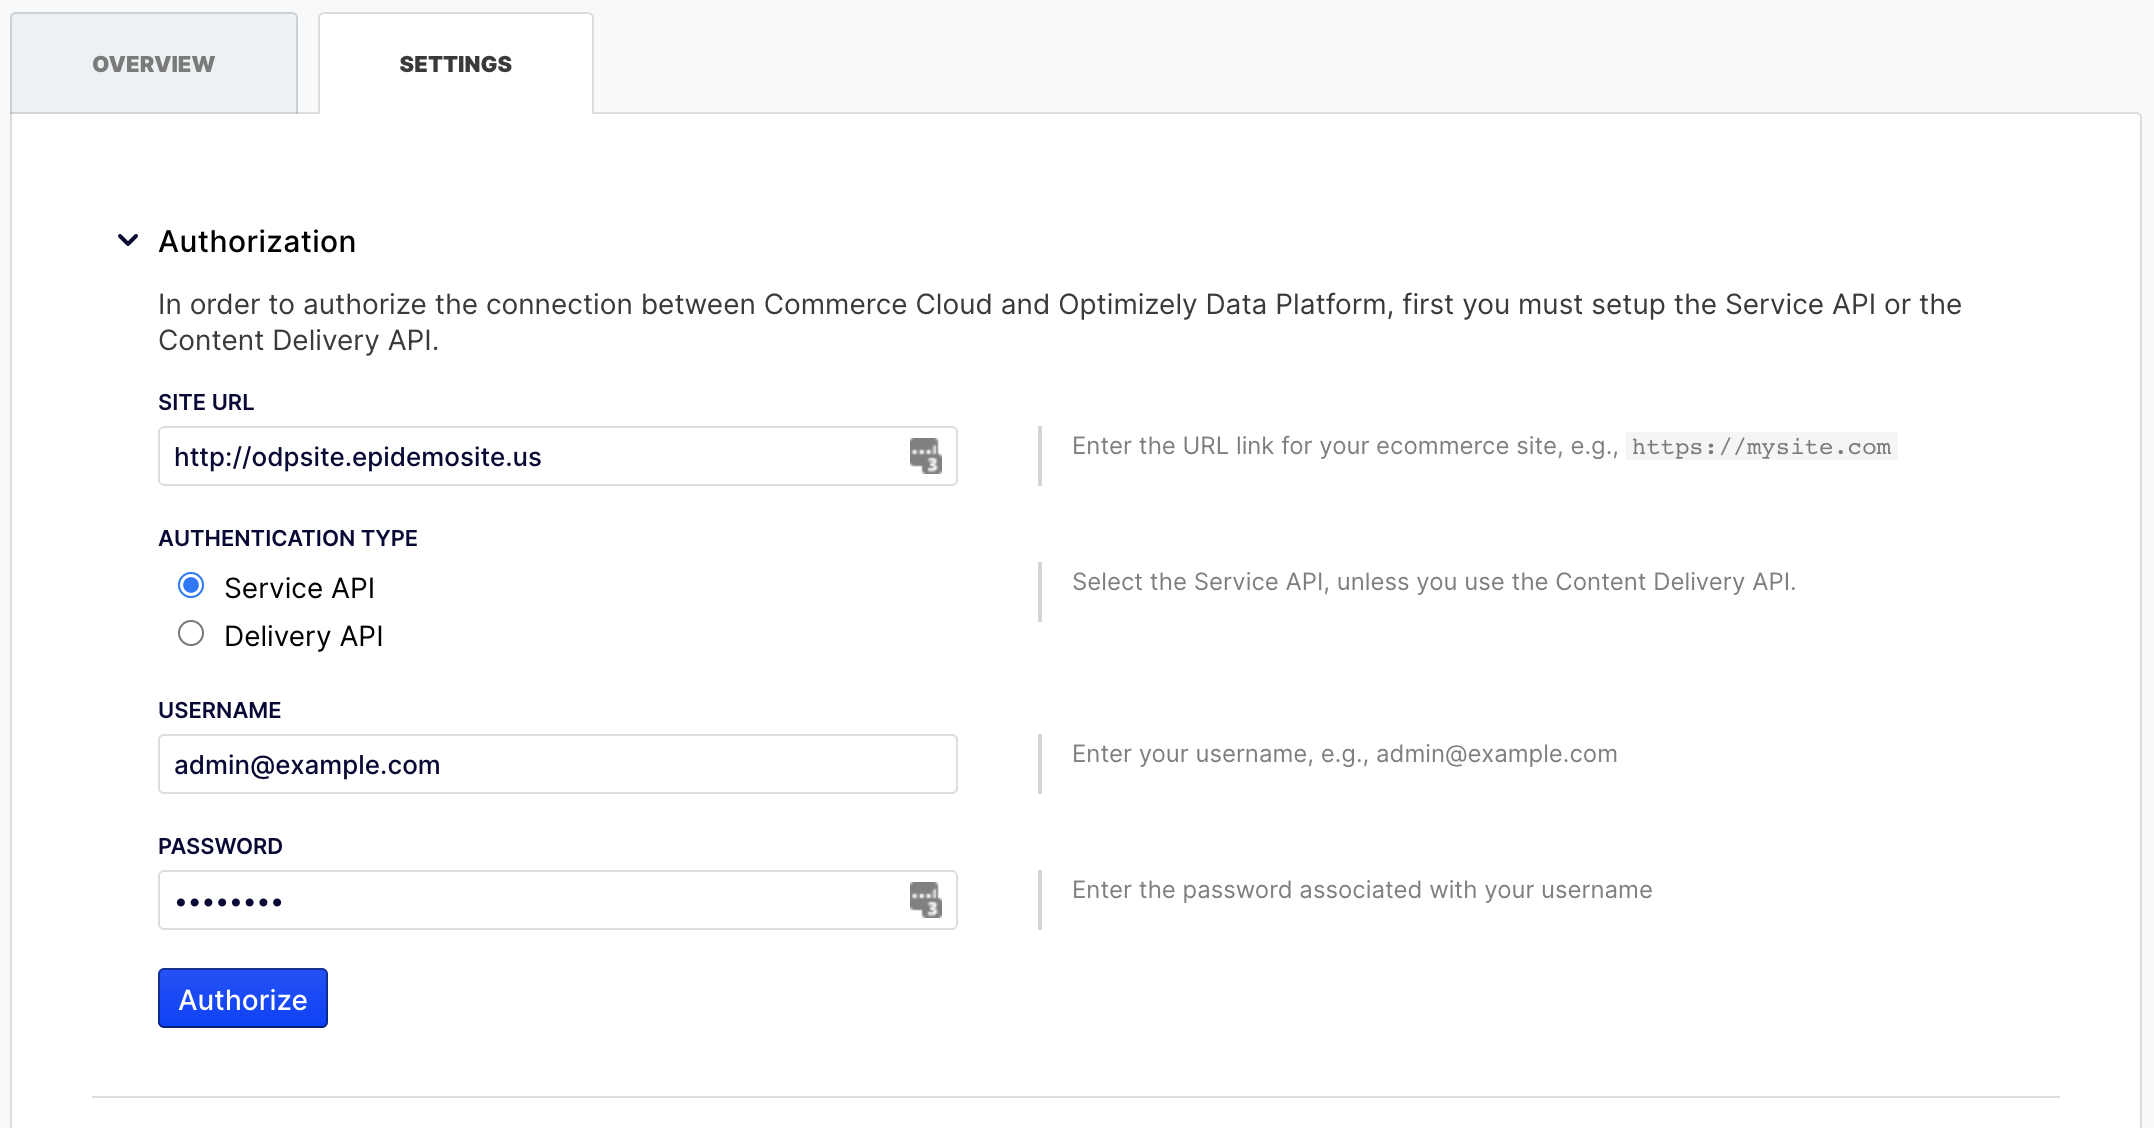
Step 1. Authorize connection in ODP
- In ODP, go to App Directory > Optimizely Commerce Cloud.
- Click Install App.
- On the Settings tab, complete the following fields:
- Site URL – Enter the URL for your ecommerce site.
- Authentication Type – Select your preferred authentication type. Service API is the default. However, if you use the Content Delivery API, select Delivery API.
Delivery API
If you select Delivery API, the Client ID field displays. Enter Default into this field.
- Username – Enter your Optimizely Customized Commerce username.
- Password – Enter your Optimizely Customized Commerce password.
- Click Authorize.
Step 2. Configure data imports
- Expand the Imports section.
- Choose which objects to manage through the integration. ODP enables imports by default.
- Click Import.
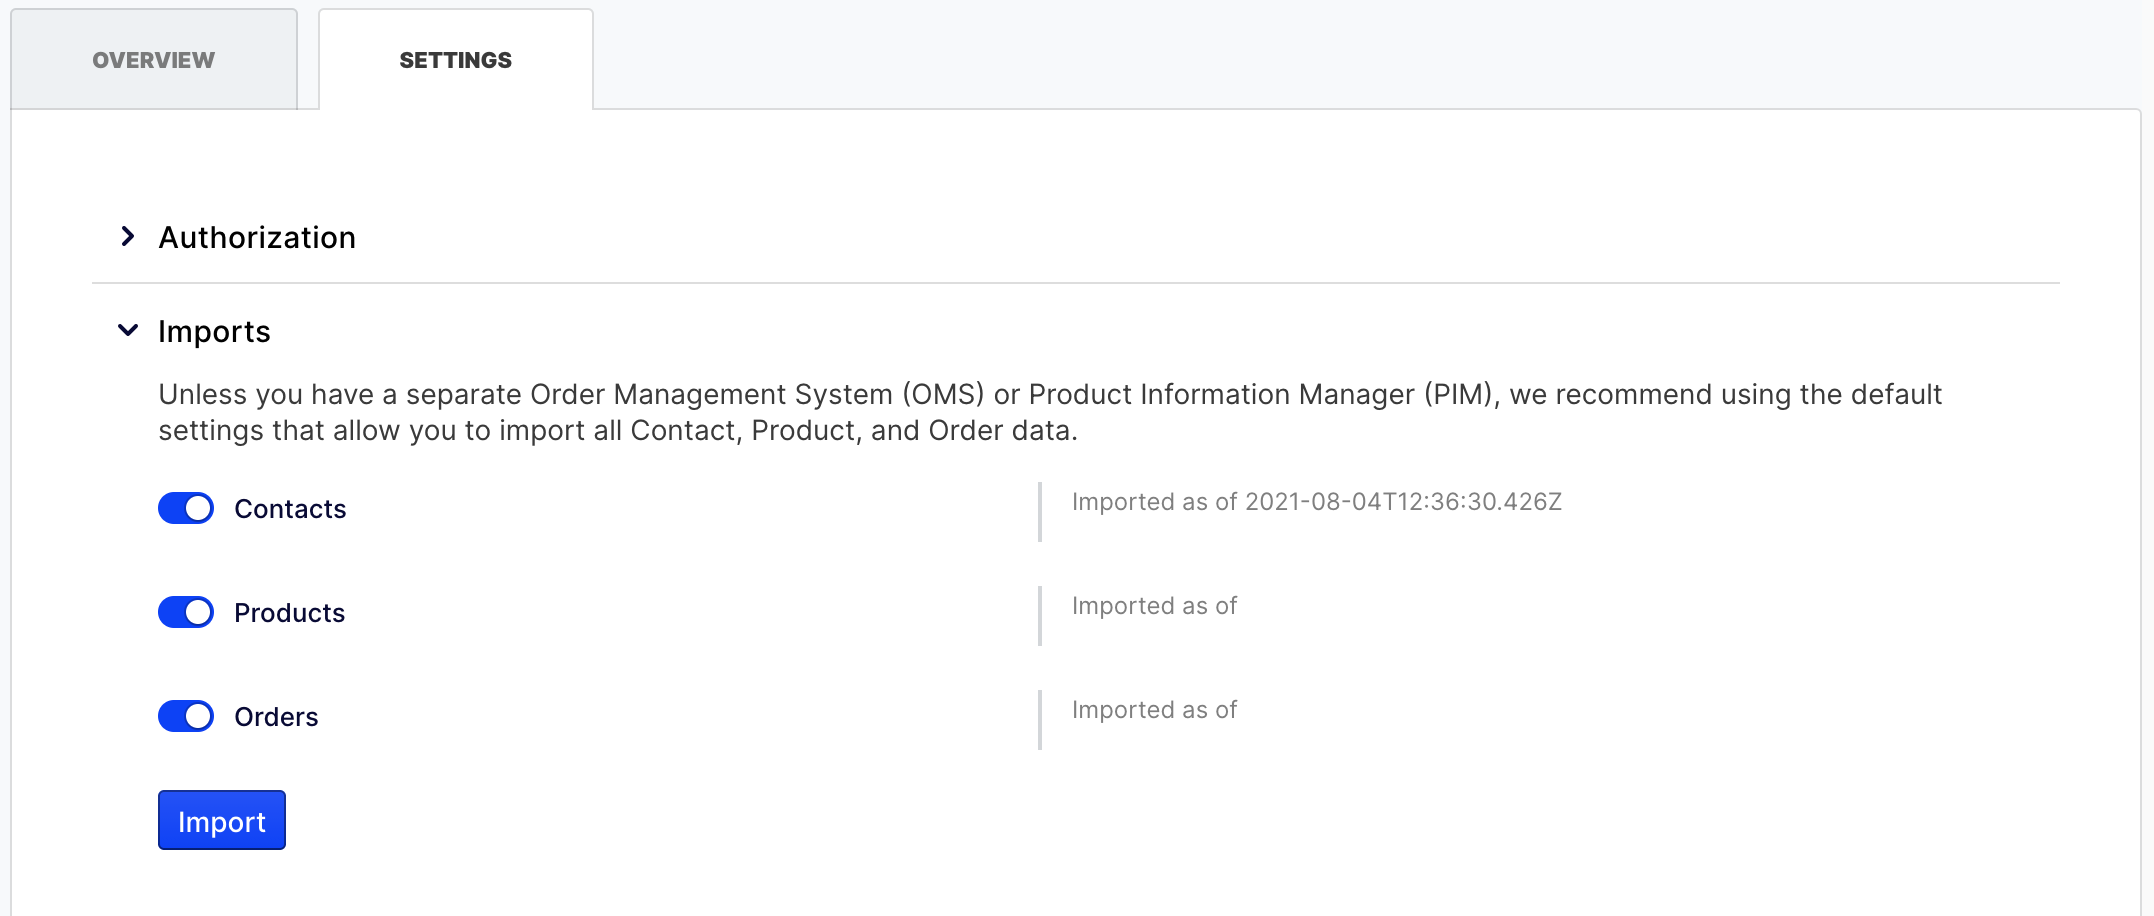
Note
You can track the progress of the data imports using the Activity Log.
Step 3. Configure on-site tracking
To track Optimizely Customized Commerce events on your site, you must add ODP’s JavaScript tag to your site. If you want to track other events including:
- Product detail viewed
- Checkout started
- Checkout completed
- Add to cart
- Add to wishlist
- Remove from cart
- Remove from wishlist
See Web SDK events.
Customized Commerce and ODP fields
Each row in the table below shows a field from Optimizely Customized Commerce used in this integration and the corresponding field in ODP.
| Optimizely Customized Commerce field | ODP field | Field type |
|---|---|---|
| Contact.PrimaryKeyId | opticommerce_id | Customers |
| Contact.Email | Customers | |
| Contact.FirstName | first_name | Customers |
| Contact.LastName | last_name | Customers |
| Contact.RegistrationSource | opticommerce_source | Customers |
| OrderForm.OrderNumber | order_id | Orders |
| OrderForm.Total | total | Orders |
| OrderForm.SubTotal | subtotal | Orders |
| OrderForm.TaxTotal | tax | Orders |
| OrderForm.ShippingTotal | shipping | Orders |
| OrderForm.Discounts.DiscountName | coupon_code | Orders |
| OrderForm.LineItem.Code | product_id | Events |
| OrderForm.LineItem.DiscountedPrice | price | Events |
| OrderForm.LineItem.Quantity | quantity | Events |
| OrderForm.LineItem.ExtendedPrice | subtotal | Events |
| Entry.Code | product_id | Products |
| Entry.Name | name | Products |
| Entry.Assets.Title | image_url | Products |
| EntryRelation.ParentEntryCode | parent_product_id | Products |
Updated 26 days ago